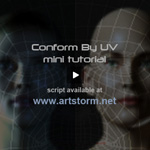
Conform By UV Video Tutorial
Lee Perry-Smith (Infinite Realities) has made a really nice mini video tutorial running for around 25 minutes demonstrating the usage of Conform By UV. Lee talks about the different modes, showing how and when to use it and runs through some practical examples with a few character models. Lots of good information if you’re interested…
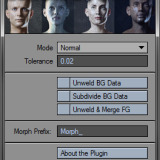
Conform By UV Released
Here’s another release available for download. Conform By UV is a plugin that I’ve developed together with Lee Perry-Smith who came up with all the ideas and also contributed with the logo and testing. The concept behind this LightWave 3D modeler addition is to be able to use a base mesh and conform it to…
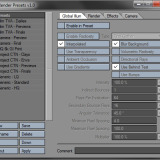
Render Presets Plugin for LightWave 3D
I just released Render Presets, another free plugin for LightWave 3D, which lets you manage a library of common rendering related settings to quickly organize, apply or switch between them. This started out as a script I wrote a long time ago when I worked with a project where I constantly needed to change between…
LightWave Core Feature List Revealed
Today NewTek revealed the feature list of LightWave CORE publicly that will be released in Q1 2010. I’m very happy that I joined the beta program of CORE back in march/april and have had the privilege to play, have input, and see this new application develop and take shape during the course of 2009. Very…

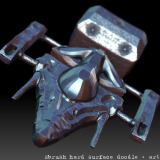
ZBrush 3.5 R3 – Hard Surface Doodles
Weekend, and I found some time to explore ZBrush 3.5 R3 which was released last week. I’ve spent a few hours playing around with the new polish, trim and planar brushes for hard surface sculpting. I can’t help continue falling deeper and deeper in love with this application, the new brushes are really awesome. I…
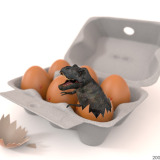
Dinochicken with Modo 401
Just another quick entry with something until I get time to update my portfolio. Here is a CG illustration of a dinochicken, chickenosaur or whatever to call it – I did a few weeks back with modo 401 for the latest issue of the magazine Filter (issue 10, October & November 2009) currently on sale…
Modo 401 Script: Export Selected To OBJ
I just released a small Python script for modo to export the selected layer(s) to an OBJ file. There were a few layer to OBJ scripts available for modo but none that worked like I wanted or properly with modo 401. I needed this functionality badly right now to bring layers out as separate OBJ…

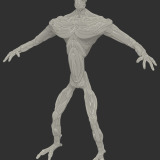
ZSketch in ZBrush 3.5
I finally had some time to play around a bit with the recently released version 3.5 of my favorite application, ZBrush. The new sketch spheres in the ZSketch mode is really interesting, and as usual with ZBrush – brilliantly fun to work with. Just a quick ZSketch i doodled together while exploring this new tool….
Turntable Viewer Version 2
I’ve just released version 2 of my Turntable Viewer to showcase rendered turntable clips on the web. Major new features in version 2 are: Implemented a loader for jpg/png/gif image sequences. Implemented a theme option to create a custom theme for the viewer. Included better documentation. Changed to a more flexible Creative Commons license agreement,…
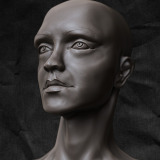
ZBrush Head Sculpt Doodle
Here’s a quickie. I couldn’t sleep tonight, so I spent some time messing around in ZBrush. I’ve doodled for an hour or two, no references used – just having some fun while trying to sculpt a decent head from a couple of ZSpheres. The neck, what to say, looooong… Well, now I guess I’ll catch…